Subtitler:Creating Subtitles
Working in Belle Nuit Subtitler is straightforward. The Subtitler documents window is a texteditor where you can type your titles. Pages are separated by two returns. Text is wrapped automatically to two lines, but you can also wrap the text manually. The style of the titles applies to the entire document. For proper subtitle editing which is often critical in space, you may want to define your title style before editing.
Open the Belle Nuit Subtitler application. An empty document window with the title "Untitled1" appears.
The subtitler document window has five sections: Style, Export, Movie, Preview and Titlelist. While the Titlelist is always visible, you can open the other three sections with the disclosure triangle when you need them.

Open the Export section. Choose your video format. Choose TIFF-RLE as the file format (most efficient with Avid) and click on the Export Folder button to choose the folder where you want your titles to be exported to. Close the Export section.

Open the Style section. Choose your font. As with all settings, you can still change the font at a later time. It is recommended to use a simple shaped font like Arial Narrow. Check bold. For the size, use 33-40 for PAL or 30-36 for NTSC. The color is video white by default (RGB 235,235,235), but you may want to change it to yellow. Click on the color rectangle to choose another color. The Level-popupmenu defines opacity. Leave it at 100% for the moment. Close the Style section.

Go to the Titlelist text editing field and start writing your subtitles. This works like SimpleText and has the standard featues cut, copy, paste and find. You can multiple undo your typing (100 levels until the last saved state). You can also redo, e.g. undo your undo.

Each page is separated by a double return. As you type, the title is shown in the Preview section. The preview section shows the amount of space you have, depending on your font, size, the video format and the left and right limits you set in the style section. The black rectangle adapts to reflect the available space.
If you are typing a line which exceeds the size limit, the text is wrapped. In the style section, you have three options for wrapping
- No wrap: Exceeding text is cut.
- Simple wrap: Exceeding text is wrapped to the second line.
- Smart wrap: If the text does not hold in one line, it is wrapped to have minimal width through both lines. In most cases, you may prefer the last option.
You can always override the automatic wrapping with a manual return. Text is only wrapped if it exceedes the size limit.
Titles are limited to two lines. A third line will not be shown.
Save your document.

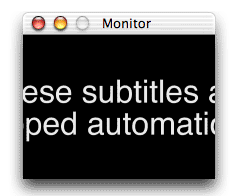
While the preview section may be appropriate for fast editing, you may want to have a closer look to the rendered title. Choose the Tools:Monitor menu. The monitor displays the rendered title.
In the Preferences, you can resize the monitor to quarter, half or full size picture. The displayed size is 4:3 or 16:9 depending on your video format setting. You can also display the Safe Title area and choose a background picture.
The monitor is updated whenever you reactivate the window.
You can always have a peek to the native non-square title image. While you click in the monitor window, you will see the native title image. While you option-click, you will see the Alpha-Channel of the title.
Title level styles
The formatting in the style section is global. It is however possible to change the formatting both on title level as on character level.
To change the formatting on title level, you add a /style comment. This allows you to set a title in italics, align on left and even change the color.
To change the formatting on character level, you use style tags like in HTML. This allows you to set an individual word in italic.
Example:
In this building behind me I spent
over 70 nights and most days ...
/style italic
10:07:53:19 10:07:57:00
during the war which lasted 77 days.
/style left
No problem. I <i>love</i> to talk about
these things if you don't mind.
For complete information about style comments and style tags, see the Subtitler:Comments chapter.
File names
By default, the file names for the subtitles are serial numbers from 0001 to the number of your titles with the extension .tif or .pct. It is the number you see in the preview-section. While this works for simple subtitling, this may create some problems with complex workflows. You may need to insert titles when you refine the subtitling. For this case, it is also possible to create an absolute file name reference using the /file comment.
Example:
/file 0345
In this building behind me I spent
over 70 nights and most days ...
/file 0345a
10:07:53:19 10:07:57:00
during the war which lasted 77 days.
/file 0346
No problem. I love to talk about
these things if you don't mind.
Spotting information
By default, a subtitle has no spotting. You can add a spotting information manually by adding TimeCodes for start and end with the /tc comment. This information will then be used to place the subtitler in your editing system.
Example:
/tc 01:00:05:02 01:00:07:24
In this building behind me I spent
over 70 nights and most days ...
/tc 01:00:08:03 01:00:09:20
10:07:53:19 10:07:57:00
during the war which lasted 77 days.
/tc 01:00:11:00 01:00:13:12
No problem. I love to talk about
these things if you don't mind.
